 After having finished my first complete image i feel that i am coping ok with the subject. At this point in time the only thing holding me back is my knowledge of the 3Ds Max program. I feel that it will take me some time to acheive a fair amount of confidence using the program. There are two ideas i have to continue my project. I am not sure how they will compare to my design for October.
Since last week the design for October has progressed slightly. Additions to the design include the storks which are created from cylinders that have been modeled using the soft selection tools. I have also added the floor and walls to create a base for the pumpkins. These are made up of boxes with custom textures.


 The above image shows my final attempt at making the fruit bowl. I'm pretty pleased with the outcome after ditching the dodgy checkered board. I think the whole table and cloth idea works
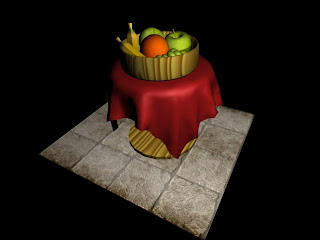
  The two modifiers used to create the shape are garment maker and cloth. When selecting garment maker you can alter the density. The higher the density the more creases there will be in the fabric. Thus making the whole thing more realistic. Once the density is set you can then add the cloth modifier. By clicking on object properties you can add the object that the cloth will be draped over, or the collision object as its called in the menu. In my case it was the top cylinder on the table. Click OK then the screen will close. All that is left to do is press the simulate button and watch the cloth form over the table.

